
In This Article
- Introduction
- Why the Insole Matters More Than the Shoe
- Step 1: Know Your Arch
- Step 2: Pull the Factory Insole
- Step 3: Trace and Trim
- Step 4: Break Them In
- Step 5: Check the Fit Weekly
- Common Fitting Mistakes
- Matching the Insole to the Job
- When to See a Professional
- Care That Stretches the Life
- Reading the Arch off Your Shoes
- The Toe Box Test
- Sock and Shoe Pairing
- Break-In Timeline, Detailed
- When a Trim-to-Fit Insole Is Not Enough
- Cleaning Without Ruining the Shape
- Travel and Rotation
- The Mistake Most First-Timers Make
- The Role of Socks in the Fit
- Heat Molding: Myth vs Reality
- Dealing With a Wide Forefoot
- How Long Until You Forget You’re Wearing Them
- Insoles for Specific Shoes
- The Return Window as a Test
- Fixing a Cut That Went Wrong
- Insoles for Kids and Seniors
- Storing Insoles Between Seasons
- The Bottom Line on Fitting
- A Note on Replacement Timing
- Verdict
Introduction
Most people blame their shoes for foot pain and stop there. The cheaper, faster fix is usually the insole. A trim-to-fit comfort insole like Akusoli drops into the shoes you already own and changes how your weight lands on your foot. Done right, it takes two minutes and pays off for months. Done wrong, you cut a $30 insert into a curled mess and blame the product.
This guide walks the whole job: figuring out your arch, pulling the right stock insole, trimming cleanly, and breaking the thing in so it stops feeling weird by day four. If you came from the Akusoli insoles review, the steps below are exactly what that product expects. The wellness gadgets category collects the other comfort and recovery gear we have tested, but the fitting method here transfers to any trim-to-fit insert.
Why the Insole Matters More Than the Shoe
Shoes get the marketing budget, but the insole is what touches your foot for ten hours. A flat factory insole lets your arch collapse, dumps load on the heel, and leaves the small foot muscles working overtime. A contoured insole fills the arch, spreads the load, and quiets those muscles. That is the difference between finishing a shift fine and finishing it wincing.
An insole attacks fatigue at the source, under your sole, which is why it is the first thing I tell anyone on their feet to try. A shoe upgrade costs hundreds. An insole costs the price of a meal and does the quieter, more direct work.
Step 1: Know Your Arch
Wet your foot and step on a dark paper towel. A full footprint means a flat arch. A thin sliver of contact means a high arch. A balanced curve means neutral. Trim-to-fit insoles like Akusoli target neutral to low arches best, because the built-in contour adds the support a flat foot lacks. High arches sometimes want a firmer, sport-specific orthotic instead.
Don’t guess from how your shoes wear. Wet-foot printing takes ten seconds and is more honest than memory. If you are flat or neutral, a universal contoured insole is your friend. If you are high-arched, test one but keep a firmer option in mind.
Step 2: Pull the Factory Insole
This is the mistake that ruins more fits than bad cutting. People drop the new insole on top of the old one. Now you have two layers fighting for space, the heel lifts, and the arch sits too high. Pull the stock insole out. Every shoe with a glued or loose insert allows it, and the new insole belongs in its place, not on top of it.
If your shoe has no removable insole, the fit is tight and the upgrade is smaller. In that case a thinner insert is the move, not a thick one stacked on a fixed bed.
Step 3: Trace and Trim
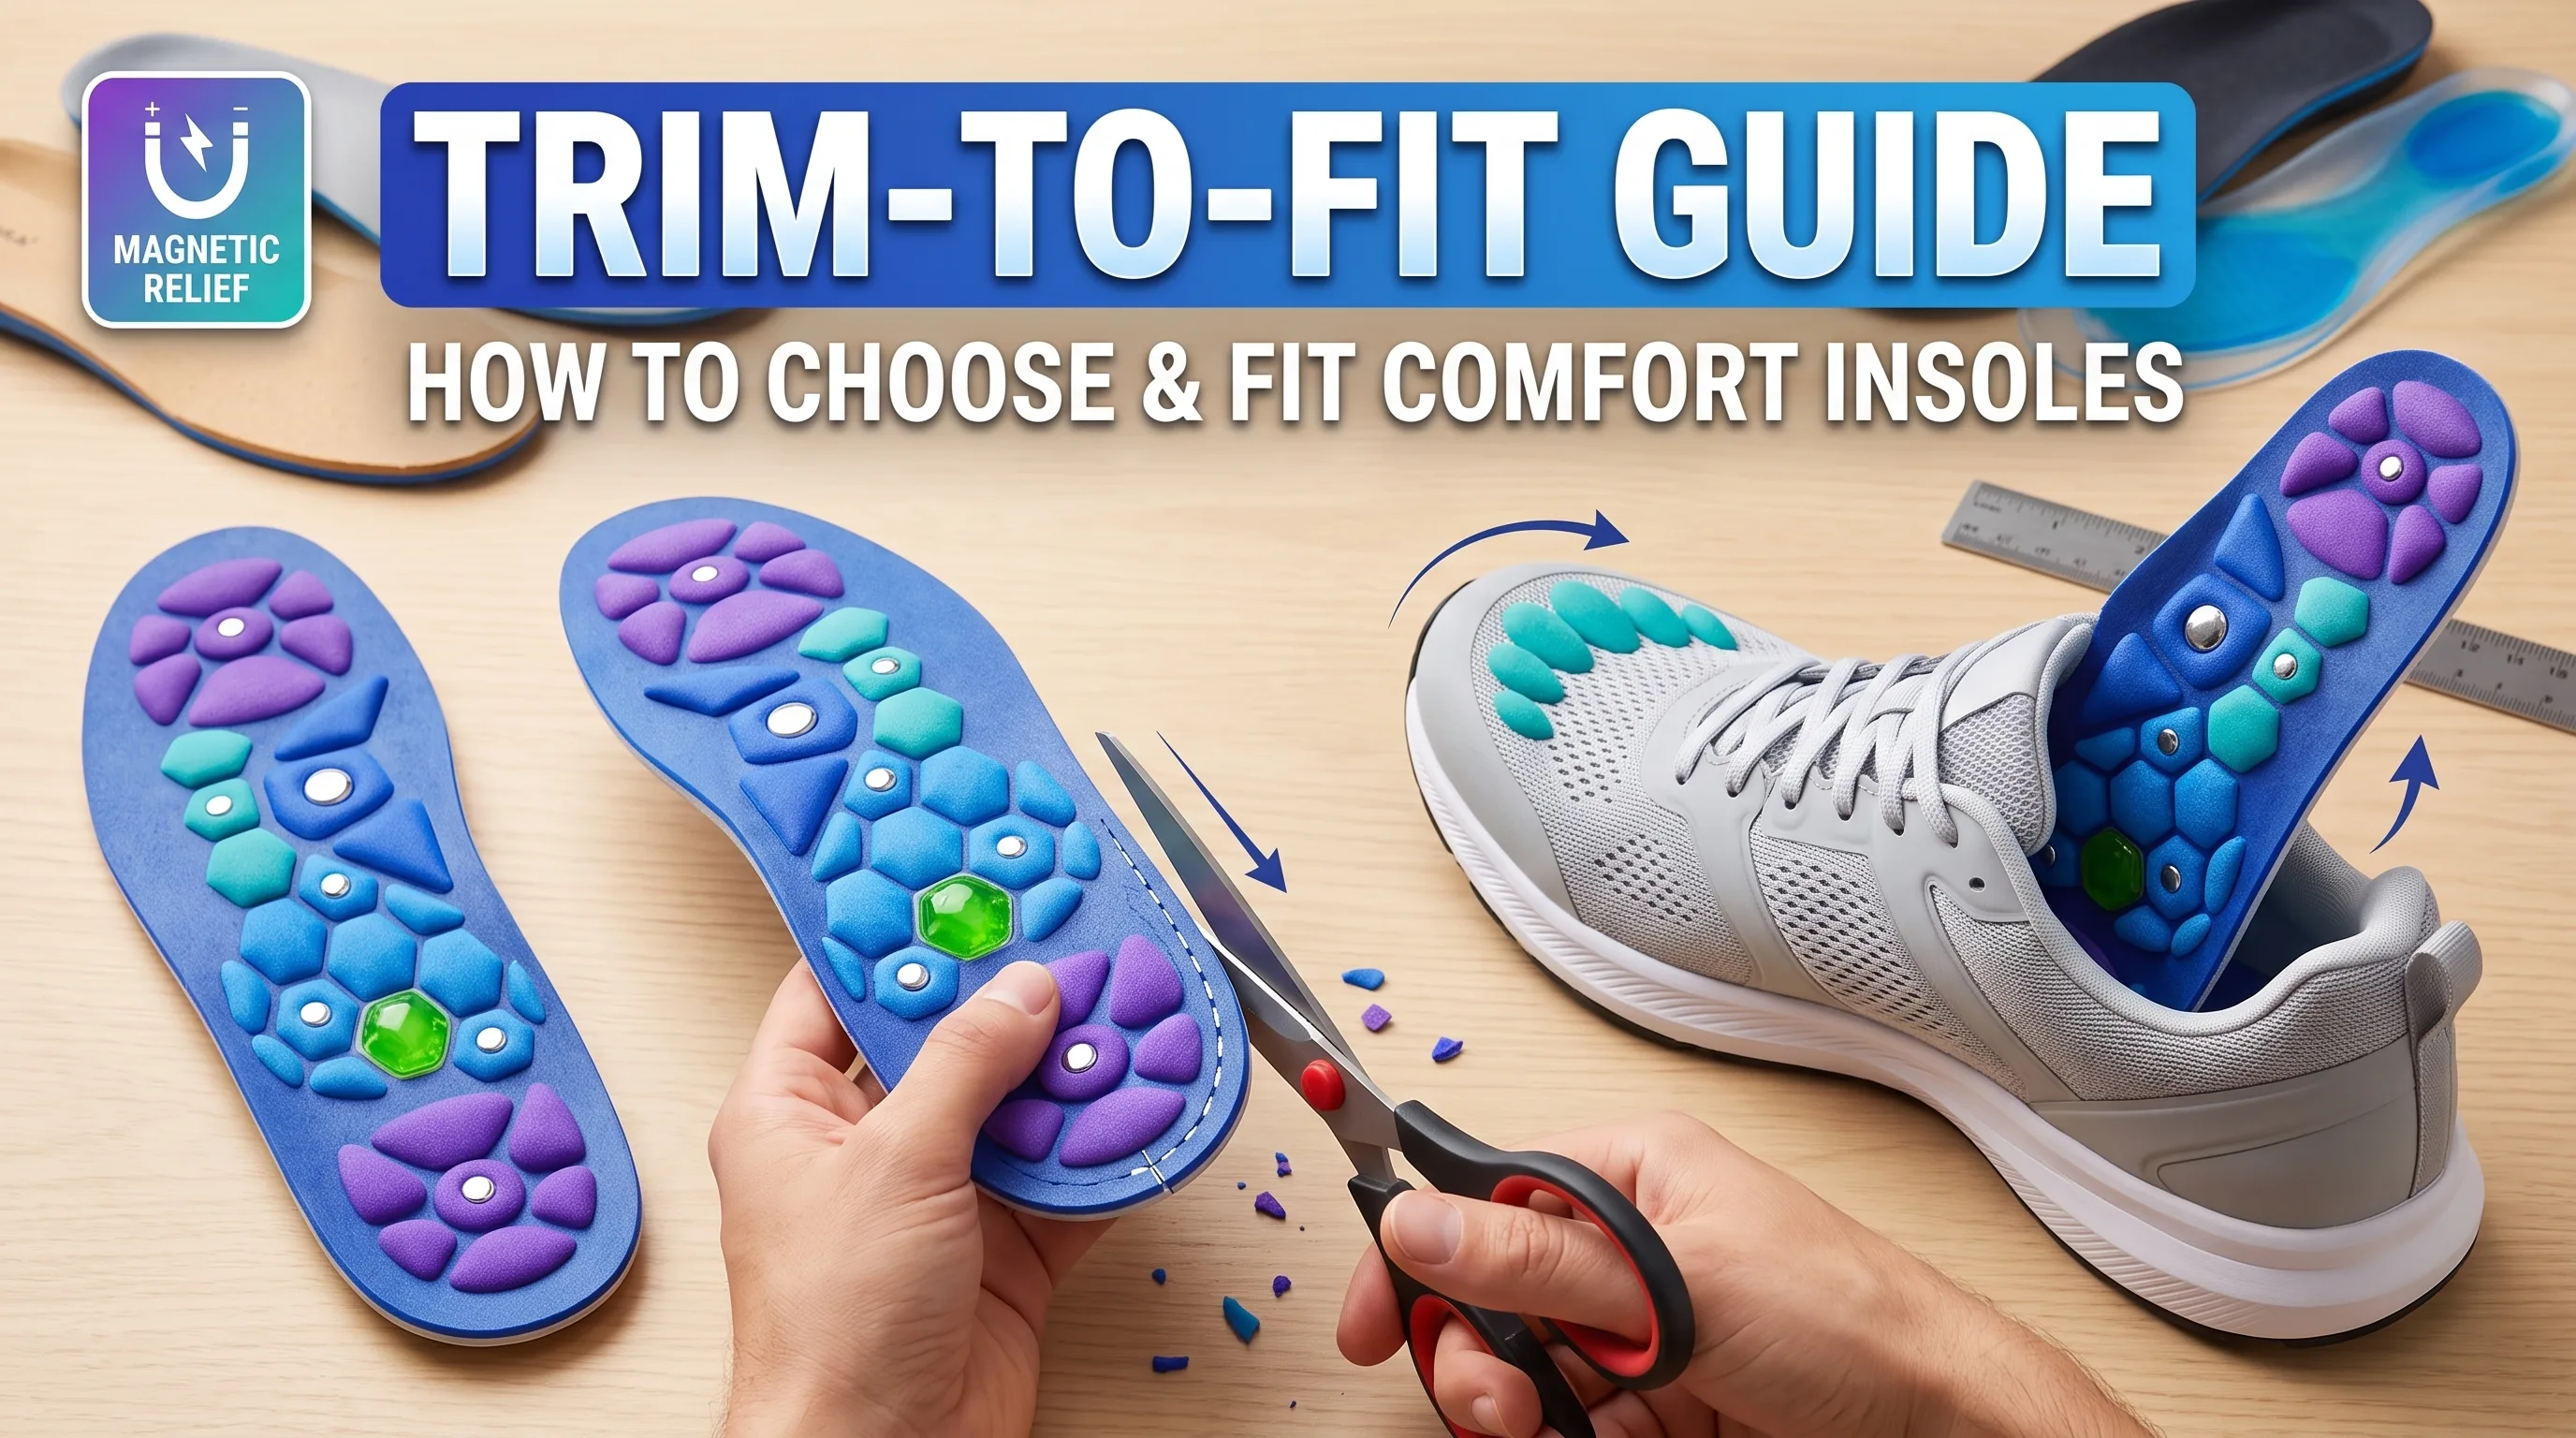
Lay the new insole over the old one, heel to heel, and trace the toe with a pen. Then cut along the printed guide lines with ordinary scissors, staying just outside the line so you can trim again if needed. For Akusoli, the S/M and L/XL bases cover most adults, and the trim lines are clear enough that a careful first cut usually lands right.
Go slow near the toe. A jagged toe edge rubs within an hour. A clean curve disappears under your foot. The whole job takes less time than finding the shoebox.
Step 4: Break Them In
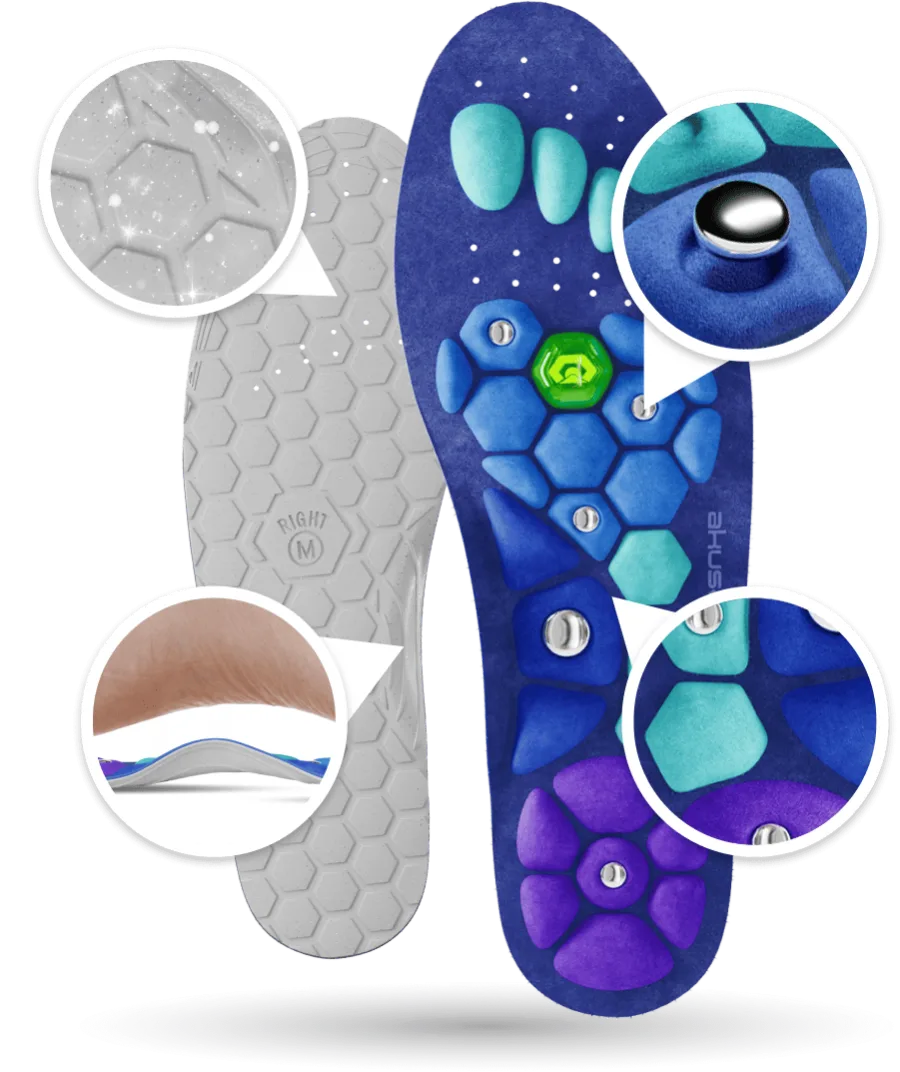
The textured nodes and raised arch feel strange on day one. That is normal, not a defect. Wear the insoles one to two hours on day one, three to four on day two, and build to a full shift by day five. Within a week the sensation fades into background comfort and the support takes over.
If sharp pain shows up instead of mild strangeness, pull them and check the cut. Pain that persists past two weeks means the shape is wrong for your foot, and you should use the return window rather than push through.
Step 5: Check the Fit Weekly
A good cut stays put. If the toe curls, your heel lifts, or the arch presses a hot spot, the trim is off. Re-trim the toe or size up to the larger base next time. Most “the insole didn’t work” complaints trace back to a cut made in a hurry, not to the product.
A two-minute weekly glance at the toe and arch catches problems before they become blisters. The insole cannot tell you it is curling. Your foot can, once it hurts.
Common Fitting Mistakes
- Stacking insoles instead of replacing the stock one.
- Cutting inside the line and ending up too short.
- Skipping the break-in and wearing them twelve hours on day one.
- Putting them in a flimsy shoe with no structure to build on.
- Expecting magnets to do the work the foam and arch are already doing.
Every one of these is avoidable, and every one of them explains a bad review that had nothing to do with the insole’s quality.
Matching the Insole to the Job
Not every insole fits every foot. A few rules of thumb:
- Everyday standing: a moderate contoured insole with odor control, like Akusoli, is the sweet spot.
- Running or hiking: a firmer sport orthotic holds the arch under load better.
- Dress shoes: thin and shaped, because depth is limited.
- Wide feet: measure the old insole first; trim-to-fit helps but the base must clear your width.
Pick for the job, not for the loudest claim on the box.
When to See a Professional
An insole is a comfort tool, not a treatment. If you have diabetes, numbness, persistent swelling, or pain that wakes you at night, a podiatrist should look before you self-treat. The Akusoli insoles review covers this same boundary: support yes, cure no. A clinician’s plan beats a comfort insert for anything diagnosed, and no insole should delay real care.
Care That Stretches the Life
Wipe with a damp cloth, don’t soak, air dry away from heat, and pull them out overnight when you can. Letting the shoe and insole breathe kills the warm damp environment bacteria love. Buyers who do this report several months of solid use; buyers who don’t blame the product for a habit problem.
Reading the Arch off Your Shoes
If wet-foot printing feels like a chore, your worn shoes tell the same story. A shoe that wears evenly across the heel and ball suggests a neutral arch. Heavy wear on the inside edge of the heel points to overpronation, where the arch collapses inward. Wear on the outside edge suggests a high, rigid arch. None of this replaces the wet test, but it confirms what to expect from an insole before you cut.
Overpronators get the most from a contoured arch, because the insole stops the roll. High arches get less dramatic change but still benefit from the cushion. The point is to walk in knowing your pattern, so the feel of the new insole makes sense on day one instead of confusing you.
The Toe Box Test
After trimming, the toe of the insole should sit flat against the shoe’s toe box with no lift. A lifted toe means the cut is too long, and that lifts your whole forefoot, which defeats the arch. Trim a few millimeters at a time until the toe lies flat. This single check prevents more fit complaints than any other, and it takes ten seconds.
If the toe keeps lifting no matter how much you cut, the base is too large for the shoe. Move that pair to a roomier shoe and cut a fresh one for the tight shoe. The multi-pair packs exist so you are not stuck with one wrong cut.
Sock and Shoe Pairing
The insole is not the only variable. Thin dress socks and a tight shoe leave no room for a thick insert. Athletic socks and a roomy trainer give it space to work. Match the sock you actually wear to the shoe you put the insole in, then trim for that combo. Switching to thick winter socks in the same shoe can crowd the fit, so re-check the toe when the season changes.
Break-In Timeline, Detailed
The week-one strangeness deserves a clearer timeline, because most quitters bail in the wrong window.
- Day 1: pebble feeling under the ball and heel. Wear one to two hours only.
- Day 2 to 3: the feeling fades but the arch still feels “present.” Wear half shifts.
- Day 4 to 5: background comfort sets in. Wear full shifts if no pain.
- Day 6 to 7: you stop noticing the gear. Support is doing the work.
If sharp pain appears at any point, stop and check the cut. Ache is normal; pain is not. The line between them is the difference between a break-in and a wrong shape.
When a Trim-to-Fit Insole Is Not Enough
Some feet need more than a universal shape. Flat feet with pain that radiates to the knee, a diagnosed plantar tear, or post-injury recovery call for a clinician’s mold. An over-the-counter insole is a great first step and often enough, but it is not a ceiling. If a month of correct use does not move the needle, that is the signal to step up, not to keep buying budget pairs hoping one clicks.
Cleaning Without Ruining the Shape
A quick note on cleaning, because people soak insoles and wonder why they warp. Wipe with a damp cloth and a little mild soap. Press out excess water with a towel. Air dry at room temperature, never on a radiator or in a dryer. Heat is what melts the contour and loosens the adhesive. Ten minutes of care after a sweaty week adds months to the life.
Travel and Rotation
If you travel or work long stretches, rotation is the quiet hero. Two pairs means one is always dry, the silver coating stays effective, and neither takes the full daily load. Label them by shoe so you are not re-trimming. The small habit is why some buyers report a year of use from a product rated for months.
The Mistake Most First-Timers Make
Pulling it all together, the single most common error is cutting too small in a hurry. The fix is boring: cut big, try, cut again. The insole forgives a second pass and does not forgive a short first one. Everything else, the break-in, the pairing, the cleaning, follows from giving the trim the two minutes it deserves.
The Role of Socks in the Fit
Socks are half the fit and nobody mentions them. A thin sock in a roomy shoe lets the foot slide, which fights the arch. A thick sock in a tight shoe crowds the insole and lifts the toe. Match the sock you wear daily to the shoe you fit, then trim for that pair. If you change to thick winter socks, re-check the toe, because the extra bulk shortens the space. The insole did not shrink. The sock grew.
Heat Molding: Myth vs Reality
Some premium insoles heat-mold to your foot. Trim-to-fit insoles like Akusoli do not, and you should not oven them. The foam is not built for heat, and warming it distorts the contour instead of shaping it. The “mold” here is the trim and the break-in, not a heat step. If a listing hints at heating a budget insole, ignore it. The shape comes from the cut and your foot, not from your oven.
Dealing With a Wide Forefoot
Wide feet are the one fit caveat worth repeating. The base is generous but not endless. If your foot spills over a standard insole’s edge, measure the old insole before ordering. If the L/XL still feels narrow at the ball, the product may not be for you, and forcing a trim wider than the base just creates a weak edge that curls. Know this before you cut, because a cut insole is not returnable in every region.
How Long Until You Forget You’re Wearing Them
The goal of any insole is to disappear. Day one it is all you feel. Week one it is background. Week two it is gone, and only the lack of evening pain reminds you it is there. If at week two you still notice it constantly, the shape is slightly off, and a small re-trim or a different size base is the move. Constant awareness is a signal, not a feature.
Insoles for Specific Shoes
- Work boots: roomy, take a full contoured insole well. The best case for odor control.
- Trainers: roomy to snug, trim to the exact footprint. Ideal.
- Loafers: low depth, need a thinner insert. A thick one crowds the heel.
- Heels and dress shoes: minimal room, often not worth it. Skip or use a thin specialty insert.
- Sandals and open shoes: no enclosed space, insoles do not apply.
Match the insole depth to the shoe depth. Thickness is not a virtue when it crowds the fit.
The Return Window as a Test
A 60-day window is long enough to run the real experiment. Trim, break in, wear for a month, then decide. If your feet are not better and the fit is correct, send them back. The window exists so you can prove the product on your own body, not so you can hoard doubts. Use it. Buyers who treat it as a test, not a gamble, end up either pleased or refunded, and both are fine outcomes.
Fixing a Cut That Went Wrong
Mistakes happen. If you cut too short, the toe curls and rubs, and the fix is to start a fresh pair if you have the multi-pack, or accept a slightly short insole in a shoe with a deep toe box where the curl does not touch. If you cut a jagged edge, a second clean pass with sharp scissors smooths it. If you trimmed the wrong base size, the arch sits in the wrong place, and no touch-up saves it. The lesson is boring but free: cut big, check, cut again. The cost of patience is zero. The cost of a hasty cut is a wasted pair.
Insoles for Kids and Seniors
Seniors benefit most from steadier steps and one pair for everyday shoes, with a doctor’s okay if circulation or sensation is already a concern. Kids are trickier: Akusoli sizing starts at EU 36, roughly a women’s US 5, so smaller feet will not fit. For a child with foot pain, a clinician should weigh in rather than a trim-to-fit insert, because growing feet need proper assessment. The insole is an adult tool first, and that boundary matters more for the extremes of age.
Storing Insoles Between Seasons
If you swap shoes by season, store the off-season inssole flat, not folded, in a dry place. Folding creases the arch and weakens the shell. A flat drawer or the shoe itself is the right home. A creased insole never recovers its shape, and a bent arch does nothing for your foot. Storage is the last small habit that protects the purchase.
The Bottom Line on Fitting
Every problem buyers report traces back to one of five things: wrong size base, stacked on the old insole, cut too short, no break-in, or wrong expectations about magnets. None of those is the product. The fitting method here removes four of the five, and the review removes the sixth by setting the magnet expectation straight. Do the steps and the insole does what it is built to do.
A Note on Replacement Timing
Knowing when to replace beats waiting for failure. Check the arch monthly. When the contour flattens, the top tears, or the silver coating stops controlling odor, the support is gone even if the insole looks intact. A flat arch in an insole is the same as no arch at all, so replacement is when the shape goes, not when the hole appears. Mark the date you started wearing them and plan a swap around the life the seller states, adjusted for your hours. Heavy daily wear shortens life; rotation lengthens it.
Verdict
Fitting a trim-to-fit insole is a five-step job that takes minutes and pays for itself in one good shift. Match the arch, replace the stock insole, cut clean, break in slowly, and check the fit. Do that and a budget insole like Akusoli will feel like a shoe upgrade you didn’t pay for.
Common Questions & Answers
Q: How do I know my arch type?
Wet your foot and step on paper. A full footprint means flat, a thin line means high, and a balanced curve means neutral. Neutral and low arches get the most from trim-to-fit insoles.
Q: Can I put insoles in any shoe?
Most shoes with a removable factory insole yes. Slip-ons and very flat soles give less benefit because there is no structure to build on.
Q: Why do my insoles hurt at first?
The textured nodes and arch raise are new to your foot. A three to seven day break-in is normal. If pain persists past two weeks, the shape may not suit you.
Q: Are magnetic insoles worth it?
The support and cushioning do the real work. Magnetic therapy has weak scientific backing, so judge an insole by its shape and foam, not its magnets.
Q: How long do comfort insoles last?
With daily wear, expect several months of shape retention from a quality insert. Replace when the arch flattens or the top tears.
Q: Should I size up or down?
Size to the larger base and trim down. A too-small insole that curls at the toe cannot be fixed, but a large one can always be cut.
Q: What makes a smart gadget worth buying in 2026?
Look for proven real-world performance, not just spec-sheet numbers. A smart gadget is worth buying when it solves a daily problem reliably, integrates with your existing ecosystem, and has a track record of software updates and good customer support from the manufacturer.
Q: How long do smart gadgets typically last before needing replacement?
Most smart gadgets have a functional lifespan of 2-4 years depending on usage intensity and battery care. Devices with replaceable batteries and active software support tend to last longer. Check the manufacturer's update commitment timeline before purchasing.
More Wellness Gadgets Guides

Related Product Reviews


Health tech researcher and wellness gadget reviewer. PhD in Biomedical Engineering. Tests sleep trackers, massage devices, and health monitors with clinical precision. Believes in data-driven wellness.