
How to Choose a Heated Vest
Everything you need to know before buying a heated vest: heating zones, battery life, sizing, materials, and the features that actually matter in winter.
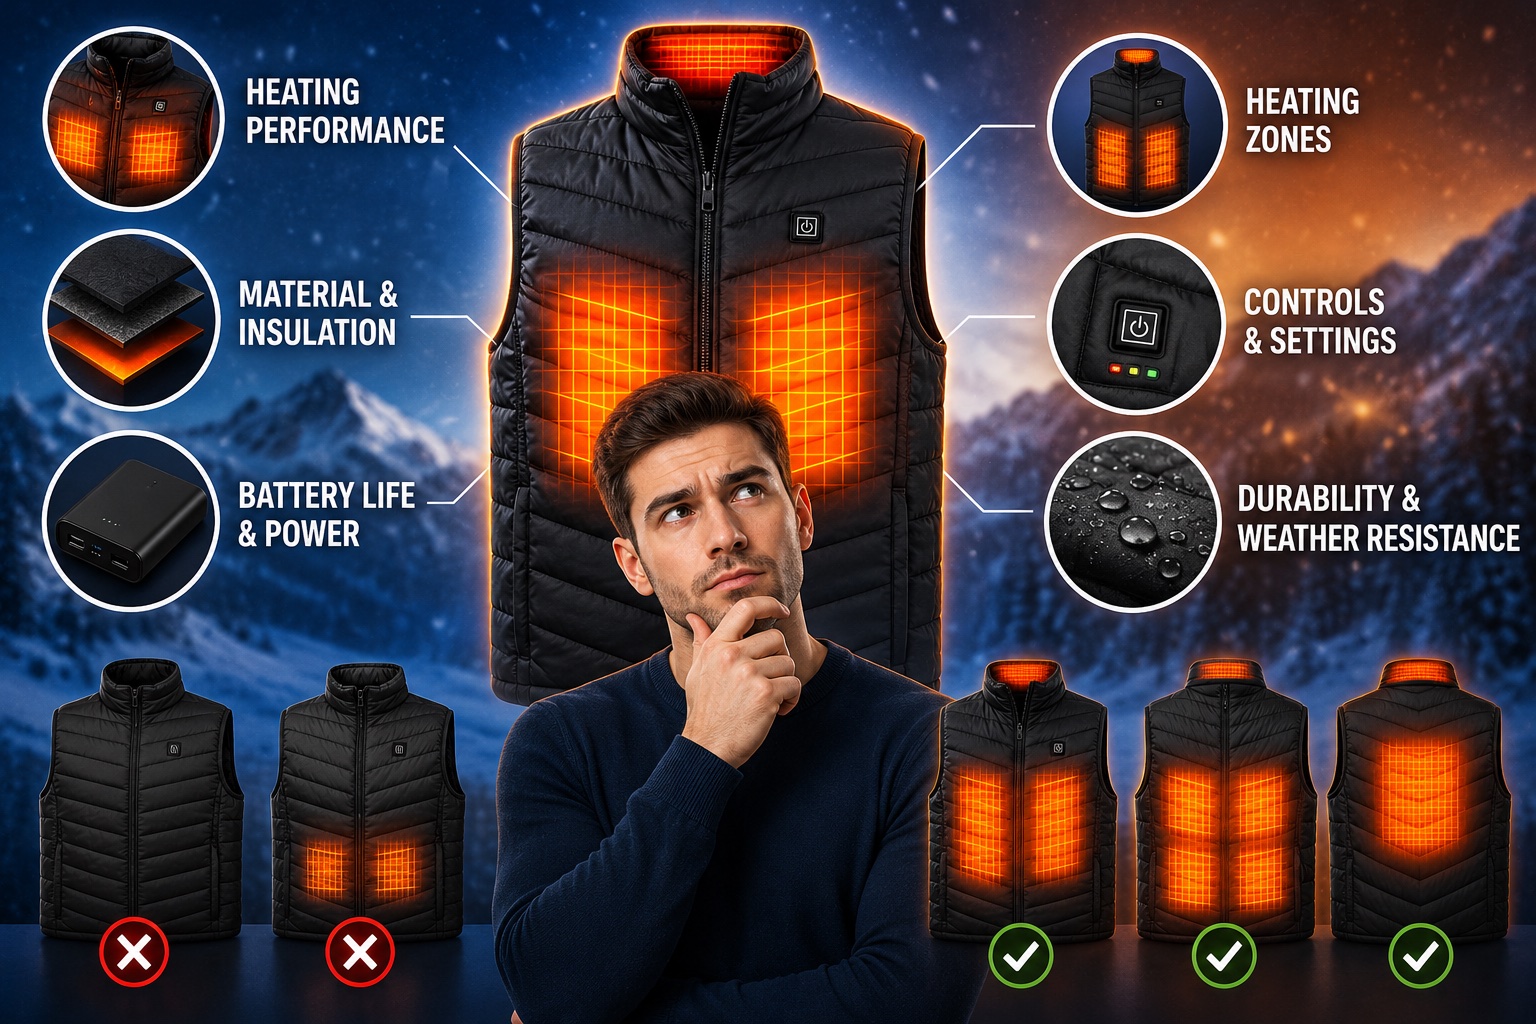
In This Article
- Step 1: Figure Out How You’ll Use It
- Step 2: Heating Zones and Placement
- Step 3: Battery Life and Power
- Step 4: Battery Inclusion and Total Cost
- Step 5: Sizing and Fit
- Step 6: Material and Weather Resistance
- Step 7: Extra Features Worth Paying For
- Step 8: Set Your Budget and Compare
- Common Mistakes First-Time Buyers Make
- Quick Decision Framework
A heated vest is one of those products that sounds like a gimmick until you actually wear one in January. Then it becomes the thing you reach for every morning. But the market is crowded, the specs are confusing, and most product pages bury the details that actually matter under marketing fluff. If you’re just starting to explore heated clothing, my wearable tech category breakdown covers the broader landscape.
This guide walks through what to look for when buying a heated vest, based on testing dozens of models over three winters. Whether you’re looking at the HeatArmor, an Ororo, or any other brand, these are the variables that decide whether you’ll love the vest or regret the purchase.

Step 1: Figure Out How You’ll Use It
Before you compare a single spec, define your use case. A daily commuter who needs 30 minutes of warmth walking to transit has different requirements than an outdoor worker who needs 8 hours of continuous heat in 20°F weather.
The three biggest use-case variables:
Duration. How long do you need the vest to keep you warm? If it’s under 2 hours, almost any heated vest will work. If it’s 4-6 hours, battery life becomes critical. If it’s a full 8-hour workday, you need either a very efficient vest or a spare battery.
Temperature range. Are you dealing with 35°F mornings or 15°F all-day? Higher temperatures require less from the vest. Extreme cold demands more heating zones, higher settings, and better insulation.
Activity level. Moving generates body heat. If you’re walking or working, you’ll need less from the vest than if you’re sitting still at a bus stop or in a deer stand. Sedientary use puts more demand on the heating elements and drains the battery faster.
Write down your top two or three scenarios before you start shopping. That gives you a filter for every spec you’ll encounter.
Step 2: Heating Zones and Placement
Heating zones are the carbon fiber elements sewn into the vest that generate warmth. More zones mean more coverage, but they also draw more power from the battery.
Two zones (minimum): Two front chest panels. This is the bare minimum and what you’ll find on the cheapest vests. It keeps your chest warm but leaves your back and neck exposed.
Four zones (recommended): Front chest, upper back, and collar. This is the sweet spot for most people. The heated collar makes a real difference in wind and cold, and the back panel prevents that uncomfortable cold-spot feeling between your shoulder blades.
Five or more zones (premium): Front chest (left and right), upper back, mid-back, and collar. More granular coverage means more even warmth. The HeatArmor, for example, uses five zones at a budget price. The trade-off is slightly shorter battery life since more elements are drawing power.
For most buyers, four zones with a heated collar is the best balance of warmth and battery efficiency. Five zones are better if you run cold or spend time in genuinely freezing conditions.
Step 3: Battery Life and Power
This is where heated vest marketing gets the most creative. Every company advertises the maximum number, which means the low setting in mild cold. Real-world use tells a different story.
Here’s what to expect from a standard 10,000mAh power bank:
| Setting | Expected Runtime | Best For |
|---|---|---|
| Low (~110°F) | 6-8 hours | Mild cold, indoor/outdoor transitions |
| Medium (~125°F) | 4-6 hours | Moderate cold, daily commuting |
| High (~140°F) | 2-4 hours | Extreme cold, rapid warmth |
Cold weather shortens battery life by 10-20%. If you’re shopping for all-day use, look for vests that deliver 8+ hours on medium, not low. And check whether the battery is included. Vests that sell the battery separately add $25-40 to the real cost.
A spare battery weighs almost nothing and effectively doubles your runtime. If you’re buying for outdoor work, budget for two batteries.
Step 4: Battery Inclusion and Total Cost
This trips up more first-time buyers than any other spec. Some heated vests include the battery. Others sell it separately. The listed price doesn’t always make this clear.
Example cost comparison:
| Vest | Listed Price | Battery Included? | Real Cost |
|---|---|---|---|
| HeatArmor | $60 | No | ~$85-95 |
| Ororo Lightweight | $160 | Yes | $160 |
| Savior Heat | $100 | Yes | $100 |
When the battery is included, the listed price is what you pay. When it’s not, add $25-40 for a quality 10,000mAh power bank. Always compare the total cost, not just the sticker price.
The upside of a separate battery: you choose the capacity and brand. The downside: it’s an extra purchase and an extra thing to keep track of.
Step 5: Sizing and Fit
Heated vests fit differently than regular clothing. The heating elements need to sit close to your body to transfer warmth efficiently, so most vests are cut snugger than a standard vest or jacket.
General sizing advice:
- Order one size up if you plan to layer over a sweater or fleece
- Order your normal size if you’ll wear it over just a t-shirt or base layer
- Check the manufacturer’s size chart rather than going by your usual size. Chest and waist measurements matter more than the label
A too-tight vest restricts movement and reduces heating effectiveness. A too-loose vest lets cold air circulate between the vest and your body, which undermines the whole point. The sweet spot is snug but not restrictive, with enough room for your intended base layer.
Some brands run particularly small. I’ve consistently needed to size up with budget heated vests. Premium brands like Ororo and Venustas tend to run more true to size, though Venustas offers the widest size range (up to 5XL in some models).
Step 6: Material and Weather Resistance
The outer shell determines how the vest handles weather. The inner lining determines how it feels against your skin.
Outer materials:
- Nylon: Most common. Good water resistance, durable, slightly stiff. Handles rain and snow well.
- Polyester: Lighter than nylon, less water-resistant. Fine for dry cold but not ideal in wet conditions.
- Fleece: Soft and warm but no weather resistance. Indoor or dry-weather use only.
Inner materials:
- Quilted synthetic: Standard and functional. Warm without being bulky.
- Fleece lining: Softer and more comfortable against skin. Better for all-day wear.
- Silver mesh: Some premium vests use this for breathability and heat retention.
If you’ll be outdoors in wet or windy conditions, prioritize water-resistant and windproof shells. If you’re mostly indoors or in dry cold, comfort matters more than weather resistance.
Step 7: Extra Features Worth Paying For
Not every feature justifies its cost, but some genuinely improve the experience:
Heated collar. This is the single biggest quality-of-life upgrade. Your neck and head lose heat fast, and a heated collar cuts that loss significantly. It’s worth paying extra for if you’ll be outdoors in wind.
Phone charging. Some vests let you use the battery as a power bank to charge your phone. Useful if you’re outdoors all day and don’t want to carry a separate charger.
Dual-zone controls. Lets you set different temperatures for the front and back. Useful if your back runs colder than your chest, or if you want to conserve battery by running one zone on high and the other on low.
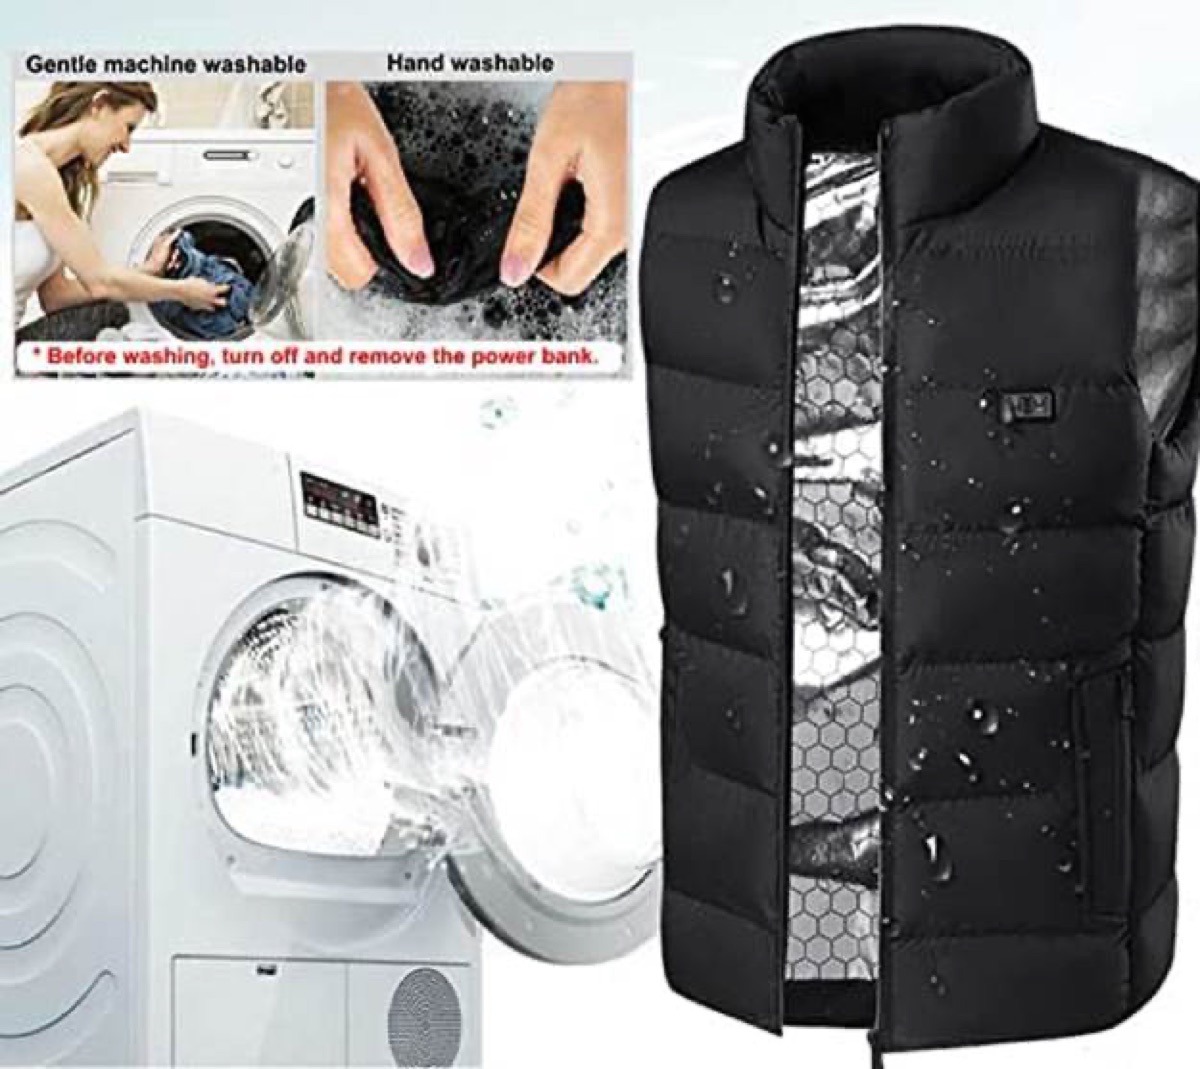
Machine washable. Not all heated vests are machine washable. Some require hand washing, which is inconvenient. Check the care instructions before buying.
These features add cost, but they also add daily usability. A heated collar and machine-washable fabric are the two I’d prioritize.
Step 8: Set Your Budget and Compare
Heated vests fall into three general tiers:
Budget ($50-80): Solid heating performance, usually missing the battery, limited color options, adequate build quality. The HeatArmor lives here. Good for occasional use or as a first heated vest to test the concept.
Mid-range ($100-150): Battery included, better materials, more features (heated collar, phone charging), good battery life. This is where most people should start. The Ororo Lightweight and Savior Heat are strong picks.
Premium ($150+): Best build quality, longest battery life, widest size ranges, most heating zones. The Venture Heat ProMax and Venustas Classic live here. Worth it if you’ll use the vest daily or need extreme battery endurance.
The right budget depends on how often you’ll use the vest. A few times a week during winter? Mid-range is the sweet spot. Daily for work? Premium pays for itself in durability and battery life. Once a month? Budget is fine.
Common Mistakes First-Time Buyers Make
Buying based on the discount. A “60% off” deal means nothing if the vest doesn’t fit your use case. Judge the product on its specs, not on how big the crossed-out number looks.
Ignoring the battery. A $50 vest with a $35 battery is an $85 vest. Compare total costs.
Skipping the size chart. Heated vests run small. Measure yourself and check the chart rather than guessing.
Expecting all-day heat on high. No heated vest delivers 8 hours on the highest setting with a standard battery. Plan for medium as your default and high as your emergency setting.
Forgetting about cold-weather battery drain. Batteries lose capacity in cold. Your 8-hour runtime in a 40°F store might be 6 hours on a 25°F morning commute.
Quick Decision Framework
Still not sure? Here’s the fast path:
- Want the cheapest way to test the concept? HeatArmor’s five-zone vest or another budget option.
- Want the best all-around pick for daily use? Ororo Lightweight Heated Vest.
- Need all-day battery for outdoor work? Venustas Classic or Venture Heat ProMax.
- Want the included battery so you don’t have to think about it? Any mid-range or premium vest.
- Need extended sizing? Venustas (up to 5XL) or HeatArmor’s extended sizes (up to XXXL).
For a detailed comparison of the top models, check my best heated vests of 2026 roundup. And if you’re weighing the HeatArmor specifically, the full HeatArmor review covers everything I found in three weeks of testing.
Frequently Asked Questions
How many heating zones do I need in a heated vest?
What battery size should I look for in a heated vest?
Do heated vests run small?
Can you machine wash a heated vest?
How long do heated vest batteries actually last?
Are heated vests safe?

Jordan Rivera
Wearable tech reviewer and fitness technology analyst. Tests smartwatches, fitness trackers, and audio gear daily. Background in sports science helps evaluate health features with expertise.
Affiliate disclosure:This article contains affiliate links. If you buy through them, GearPuff may earn a commission at no extra cost to you. It keeps our testing independent and our reviews free.